
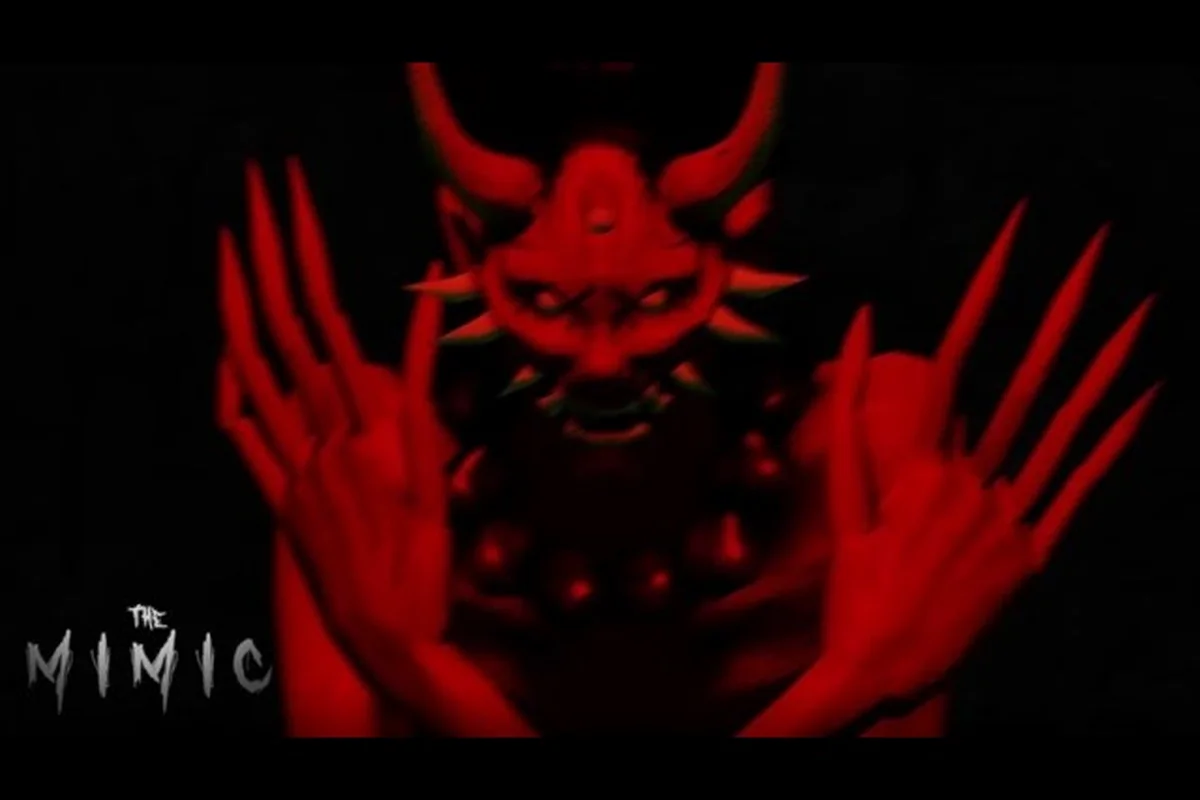
The Mimic Jealousy Chapter 2 walkthrough matters because this chapter introduces repeated spaces, shifting patrol routes, and a reward tied directly to the Lantern. Follow the objective route below to reach each objective safely, learn which doors lead forward, and avoid the mimic patterns that can restart your progress.
The Mimic Jealousy Chapter 2 walkthrough objectives and route
The central challenge in The Mimic Jealousy Chapter 2 walkthrough is navigation rather than a single isolated enemy encounter. You must locate key doors, keep track of which version of a room you are seeing, and move between objectives without drawing a mimic into an unwinnable chase. The route is more reliable when you slow down at each doorway because the same corridor can look different after a patrol change.
Official promotional material describes Jealousy as a darker, more oppressive book with duplicate-world imagery. The CTStudios Jealousy: Expectations Rising teaser gives useful context for the atmosphere and recurring visual tricks players encounter, although the chapter route still requires careful observation during play.
| Objective stage | What to do | Key checkpoint |
|---|---|---|
| First contact | Follow the opening route and collect the first key | Reach the marked lower corridor |
| Door sequence | Find the door associated with the current objective | Identify the correct duplicate room |
| Mimic pressure | Stay out of sight until the patrol changes | Move only after it passes |
| Chapter objective | Reach the final locked area | Interact with the Lantern-linked reward |
| Chapter completion | Confirm the chapter conclusion | Return through the activated exit |
Starting the chapter without wasted retries
Begin by checking every visible doorway before advancing. Many players lose time by treating a door as permanent scenery, but Jealousy uses repeated architecture and altered room states to make assumptions dangerous. Look for the objective marker, then identify the door that physically connects to the next checkpoint rather than the door that merely resembles the correct one.
If you entered the Jealousy storyline through the preceding mission, the Jealousy book chapters overview provides helpful context for the escalating mood and story structure. In practical terms, Chapter 2 assumes you understand the basic loop: enter a room, locate the next key, recognize the active patrol, and use doors to control movement.
Recognizing duplicate rooms safely
Use three visual checks whenever the environment repeats: first note the objective’s exact location, then compare the door handle and panel color, and finally listen for movement before crossing a corner. In The Mimic Jealousy Chapter 2, these checks help distinguish a looping room from a mimic-triggered reset, so returning through the wrong doorway does not cost another full patrol cycle.
-
Door hardware: Compare the handle shape, panel color, and nearby markings. A changed handle is often the fastest clue.
-
Objective placement: Check whether the required object remains in the same position or has shifted to another version of the room.
-
Sound direction: Stop near corners and listen before committing. A mimic moving behind you can force a bad route if you rely only on what is visible.
Community reports consistently describe the safest approach as scouting, waiting for the patrol, and moving during its turn. That same disciplined pattern is visible in the site's Book 3 Chapter 1 walkthrough article, which describes the careful timing that reduces repeated resets.
Door routes and room-state checks in The Mimic Jealousy Chapter 2
A dependable The Mimic Jealousy Chapter 2 walkthrough depends on reading room state, not memorizing a single set of directions. As the chapter progresses, doors may lead back into spaces you already visited, while the active objective moves through a connected version of the same building. Make a compact mental map and label each room by a visible feature rather than its position alone.
Building a usable mental map
Start with a nearby landmark and work outward. For example, call the room with the red wall panel the Red Panel Room, the one beside the long corridor the Twin Hall, and the room containing the first key the Key Room. Descriptive labels are more useful than “room one” because they remain recognizable when the layout changes.
| Landmark | Record immediately | Use it to solve |
|---|---|---|
| Red wall panel | Door side and object condition | Match the correct duplicate route |
| Long central corridor | Direction of the mimic patrol | Choose a safe crossing window |
| First locked door | Key appearance and door color | Confirm early objective progress |
| Lantern chamber | Entrance and activation state | Reach the chapter reward |
| Final exit | Which doorway is unlocked | Complete the chapter after the objective |
Update the map whenever you encounter an impossible return route. That event usually means you have entered an inactive room version, so backtrack until you find a door with the previously recorded hardware. Do not keep opening random doors because each unnecessary route gives the mimic more chances to alter the puzzle state.
Using doors to control the mimic
Doors are tools for timing. When you enter a room and hear the patrol nearby, remain just outside the threshold until the mimic commits to its route. This keeps you in a known position and prevents it from trapping you between two active doors. If the patrol passes through a doorway, wait until its footsteps recede before crossing behind it.
When the mimic remains close, move deeper into the current room rather than opening every nearby exit. A room with one known entrance is easier to monitor than a junction with three. The goal is to maintain one escape point: the doorway through which you can retreat if the mimic turns around.
Handling a reversed or reset route
The Mimic Jealousy Chapter 2 walkthrough becomes much easier when a reset is treated as useful information. Compare your current room with the last map entry. If the landmark changed, the object disappeared, or a previously locked door is open again, assume that the room state has reset and retrace only the last confirmed segment.
Do not attempt to brute-force every nearby door after a reset. Rebuild the sequence from the nearest stable landmark, because rapid trial-and-error movement tends to bring the mimic into the same corridor while you are still comparing options. Patience preserves more time than a blind search.
Mimic tactics and patrol timing for the Chapter 2 route
The most common mistake in The Mimic Jealousy Chapter 2 walkthrough is treating the mimic like a visible monster that can be outrun in a straight line. Jealousy’s danger comes from its timing. It waits, redirects, and uses doors to threaten the route, so the reliable tactic is to let it pass and continue from a predictable angle.
Reading patrol behavior
Watch one complete patrol before advancing whenever you have a safe observation point. Notice where it pauses, whether it checks doors, and how long it remains near each intersection. The key data is the turn window: the short period after the patrol commits to a direction when the next room is less exposed.
| Situation | Best response | Avoid |
|---|---|---|
| Patrol crosses the target room | Wait behind cover until it clears | Following behind at close range |
| Mimic stops near your door | Move deeper and use a second exit | Standing in the doorway |
| Mimic changes direction | Recheck the mental map | Rushing through the original route |
| Path appears reset | Return to the last stable landmark | Opening doors at random |
| Final approach begins | Hold position near cover | Entering the Lantern chamber early |
Using sound and sight together
Sound gives advance warning, but it does not reveal the mimic’s final destination. If you hear a door close after the footsteps stop, wait because the patrol may be checking a room behind you. If the footsteps continue steadily, use that movement to cross the adjacent junction. This distinction prevents the common error of crossing immediately after hearing distant steps.
The safe-room rule is simple: never leave a hiding position while the mimic is visible. Wait until it disappears completely, then wait one extra beat before crossing. That brief delay prevents immediate detection when the patrol reverses near a wall or doorway.
What to do when the mimic catches you
If contact occurs, do not keep sprinting through the same corridor. Move around the nearest corner, place a door between you and the mimic, and use the first stable room as a reset point. Trying to outrun it along a predictable hallway usually produces another catch. The objective is to break the mimic’s path, not to win a race against its pathfinding.
The mechanics also reward understanding the broader pattern rather than memorizing one route. The Jealousy character overview can help distinguish story progression from later-book opponents, while the practical lesson remains unchanged: observe the patrol and choose your crossing before you enter its detection range.
Lantern-linked reward and chapter completion route
The final portion of The Mimic Jealousy Chapter 2 walkthrough centers on reaching the Lantern-linked reward. This objective is easy to miss if you only search for a collectible icon because the surrounding doors can look inactive until the correct sequence is performed. Backtrack through the known duplicate route, identify the locked entrance, and interact only after the surrounding area is secure.
Finding the final locked area
Return to the last confirmed landmark if you lose the route, then follow the sequence that led away from the central corridor. The Lantern Chamber may become reachable through a previously active door after the necessary route is completed. Check the door that matches the recorded hardware rather than one that merely resembles it.
| Final-route problem | What it indicates | Correct move |
|---|---|---|
| Lantern room stays locked | Required route is incomplete | Revisit the last objective checkpoint |
| Door changes after activation | Chapter state has progressed | Use the newly opened connection |
| Mimic blocks the entrance | Patrol has occupied the final corridor | Wait for the patrol to clear |
| Reward cannot be collected | Interaction requires a clear approach | Enter the room and approach the Lantern directly |
| Exit remains closed | Objective state is unfinished | Confirm the reward interaction first |
Confirming the reward before leaving
Interact with the Lantern and allow the chapter conclusion to begin. Do not rush toward the exit immediately after the animation, because the post-objective sequence can still involve a short movement or door transition. Confirm that the reward notification appears and that the intended exit becomes available.
This sequence also explains why the reward is described as Lantern-linked. It is not merely another item hidden somewhere in the room; reaching it depends on completing the chapter’s route and reaching the correct active version of the final space. That makes the reward a useful checkpoint for players who are uncertain whether they truly finished the chapter objectives.
Continuing into the next chapter
After the chapter closes, use the journal or chapter screen to confirm that the next entry unlocks. If you plan to continue immediately, The Mimic Jealousy Chapter 3 walkthrough should be approached with the same landmark-and-door notes from this chapter. The later route increases pressure but does not require you to forget the fundamentals.
Likewise, The Mimic Jealousy Chapter 4 walkthrough is easier to approach when you already recognize how duplicate rooms and patrol reversals work. The broader Jealousy storyline chapter guide can help place the Lantern sequence within the overall book progression.
Advanced route planning for Jealousy Chapter 2
A clean The Mimic Jealousy Chapter 2 walkthrough depends on preparation more than heroics. Before retrying a difficult segment, write down the objective, the last stable landmark, the mimic’s patrol direction, and the door condition that should come next. This four-part note turns a confusing chase into a short, repeatable route.
Preparing for a difficult retry
| Retry status | Information to preserve | Best next action |
|---|---|---|
| Caught during patrol | Doorway used and patrol direction | Wait at the previous safe point |
| Lost after object pickup | Last activated door | Return through the known route |
| Entered wrong room | Landmark mismatch | Stop and compare visible details |
| Reset after the mimic | Stable checkpoint and nearby doors | Rebuild one segment at a time |
| Chapter appeared complete | Reward notification and exit state | Verify journal progression |
Keep the notes short enough to use during play. A list of landmarks and door states is more actionable than a long route description, especially when the duplicate layout makes north, south, and room order unreliable. If a run progresses farther than your previous attempt, update the map immediately so a later reset does not erase useful information.
Efficient door checks
Check doors in a consistent order. Start with the one directly tied to the objective, then the two nearest alternatives, and avoid low-value branches until the route is confirmed. This reduces unnecessary exposure and makes it easier to identify which door caused a reset.
The same preparation applies to the earlier The Mimic Book 2 Chapter 1 walkthrough, where learning the basic patrol grammar can prevent early confusion. For readers comparing routes across books, The Mimic Book 2 Chapter 4 walkthrough also benefits from the same rule: record room state before entering an unfamiliar branch.
Avoiding late-chapter fatigue
Long attempts often fail because attention declines after repeated resets, especially when the Mimic changes patrol behavior, closes shortcuts, or punishes a confused escape. In The Mimic Jealousy Chapter 2 walkthrough, treat each target chunk as a short route-learning objective: identify the Mimic’s current position, confirm the next doorway or corridor, and reach a recognizable checkpoint without relying on trial-and-error resets. This reduces mental fatigue during the stealth sections and makes later transitions easier to execute, while preserving information from The Mimic Jealousy Chapter 3 walkthrough and the finale rather than repeating the same trial-and-error pattern.
-
Scout: Learn one complete patrol cycle.
-
Advance: Move through one confirmed room transition.
-
Secure: Reach the objective and preserve the route backward.
After each chunk, stop for a moment to verify that you know how to return. This is especially important in The Mimic Jealousy Chapter 4 walkthrough and The Mimic Rage Chapter 1 walkthrough, where later sections may test whether you retained the route rather than simply reacted to immediate threats.
Jealousy Chapter 2 mistakes and recovery checklist
Most failed attempts in The Mimic Jealousy Chapter 2 walkthrough result from one of four mistakes: trusting the wrong duplicate door, crossing during a patrol reversal, forgetting a completed objective, or leaving before confirming the Lantern reward. Each mistake has a clear recovery process, so one bad encounter does not require restarting the entire chapter.
Quick pre-finish checklist
Before declaring the Chapter 2 route complete, cross-check each final-state condition against the active objective marker, then verify the duplicate-room landmark, the final locked-door sequence, and the mimic’s absence from the Lantern chamber. This prevents a misleading save-state appearance: if the mimic has crossed into the Lantern chamber, the Lantern-linked reward interaction may fail, leaving the chapter exit and next journal entry unavailable even after the locked door is open.
- The current objective marker has been activated.
- The correct duplicate room was confirmed by a visible landmark.
- The final locked door was opened through the required sequence.
- The mimic was not inside the Lantern chamber.
- The Lantern-linked reward interaction completed.
- The chapter exit became available.
- The journal shows the next chapter.
| Mistake | Immediate symptom | Recovery |
|---|---|---|
| Wrong duplicate | Objective remains unchanged | Compare door hardware and landmarks |
| Early crossing | Mimic turns toward you | Retreat through the last safe door |
| Forgotten key | Key door stays locked | Trace backward from the blocked door |
| Skipped interaction | Exit or reward does not appear | Return to the final active room |
| Assumed completion | Progress remains incomplete | Review the journal and active objective |
Knowing when to reset
Reset when you have lost both the objective and your position, because further blind movement only increases exposure. Do not reset immediately after one visible mistake, however. If you remain near a stable landmark, stop moving and let the patrol pass. The chapter rewards recognition, and recovering from one incorrect turn is usually faster than restarting from the entrance.
The Lantern-linked finale gives you a concrete destination, so keep that goal visible while correcting the route. When the path stops making sense, rebuild the map backward from the Lantern chamber, then reconnect it to the last objective. That reverse-tracing method is often quicker than returning to the very beginning.
Jealousy story progression after the Chapter 2 route
Completing The Mimic Jealousy Chapter 2 walkthrough advances the Jealousy book toward its later confrontations. The chapter reward and activated exit serve as practical confirmation, but story progression also depends on the next journal entry becoming available. Use the chapter menu to verify that the transition was recorded before beginning a new route.
The sequel routes follow similar principles with greater pressure. The Mimic Jealousy Chapter 3 walkthrough builds on the patrol-reading foundation, while The Mimic Jealousy Chapter 4 walkthrough pushes the player to retain more of the map and react to less predictable interruptions. The Mimic Jealousy finale ultimately tests the discipline developed throughout the book: recognize the active room, preserve a retreat, and keep the objective sequence intact.
| Progression point | Skill carried forward | Main challenge |
|---|---|---|
| Jealousy Chapter 2 | Reading door state and patrol timing | Finding the Lantern-linked reward |
| Jealousy Chapter 3 | Maintaining a reliable map | Escaping more aggressive redirects |
| Jealousy Chapter 4 | Recalling the route under pressure | Combining objectives with limited reaction time |
| Jealousy finale | Applying every route lesson | Surviving the final sequence of books |
Those names also provide a practical sequel checklist for players who want to prepare early. The Mimic Book 2 Chapter 1 walkthrough establishes the starting lessons, The Mimic Book 2 Chapter 4 walkthrough shows how they develop near the end of the book, and The Mimic Rage Chapter 1 walkthrough offers another test of the same core route discipline.
The key takeaway is simple: complete the Chapter 2 objective sequence without losing the map, use doors to control the mimic rather than running from it, and confirm the Lantern-linked reward before seeking the exit. Master those steps, and the rest of the Jealousy chapters become a matter of applying the same route-reading logic under greater pressure.
Frequently Asked Questions
What is the fastest way to complete The Mimic Jealousy Chapter 2 walkthrough?
The fastest route is to learn one complete patrol cycle, move during its turn, and verify each objective before advancing. Keep a short map of doors, landmarks, and key conditions so you can retrace only the last confirmed segment after a reset. Confirming the Lantern reward before heading for the exit also prevents an unnecessary second run.
Can the mimic be avoided without waiting for every patrol cycle?
Sometimes, but waiting is usually safer than forcing a fast crossing. Listen until the footsteps recede, then pause briefly because the mimic may reverse near a doorway. If it returns, retreat through the nearest known door and let it pass again. Consistency usually saves more time than repeatedly gambling on the patrol’s direction.
How do I find the Lantern-linked reward in Chapter 2?
Trace the route backward from the final locked area after completing the active objective. Compare door hardware and room landmarks to identify the correct duplicate space, then enter while the mimic is away. Interact with the Lantern and verify that the reward notification appears and the chapter exit becomes available.
Does The Mimic Jealousy Chapter 3 walkthrough require a completely new route knowledge?
You should understand Chapter 2’s door states and patrol timing, but later sections can rearrange or intensify those mechanics. Reuse the habit of labeling rooms by landmarks and checking the objective before opening a door. The later route will test your memory more heavily, so keeping a concise map remains valuable even if the exact path changes.
What should I do if The Mimic Jealousy finale unlocks without a reward notification?
Return to the final active room and check whether the Lantern interaction was interrupted or skipped. The chapter may also require the correct exit sequence after the objective is completed. Review the journal for the active task, retrace the final doors, and avoid leaving the area until both the reward state and exit state are confirmed.