
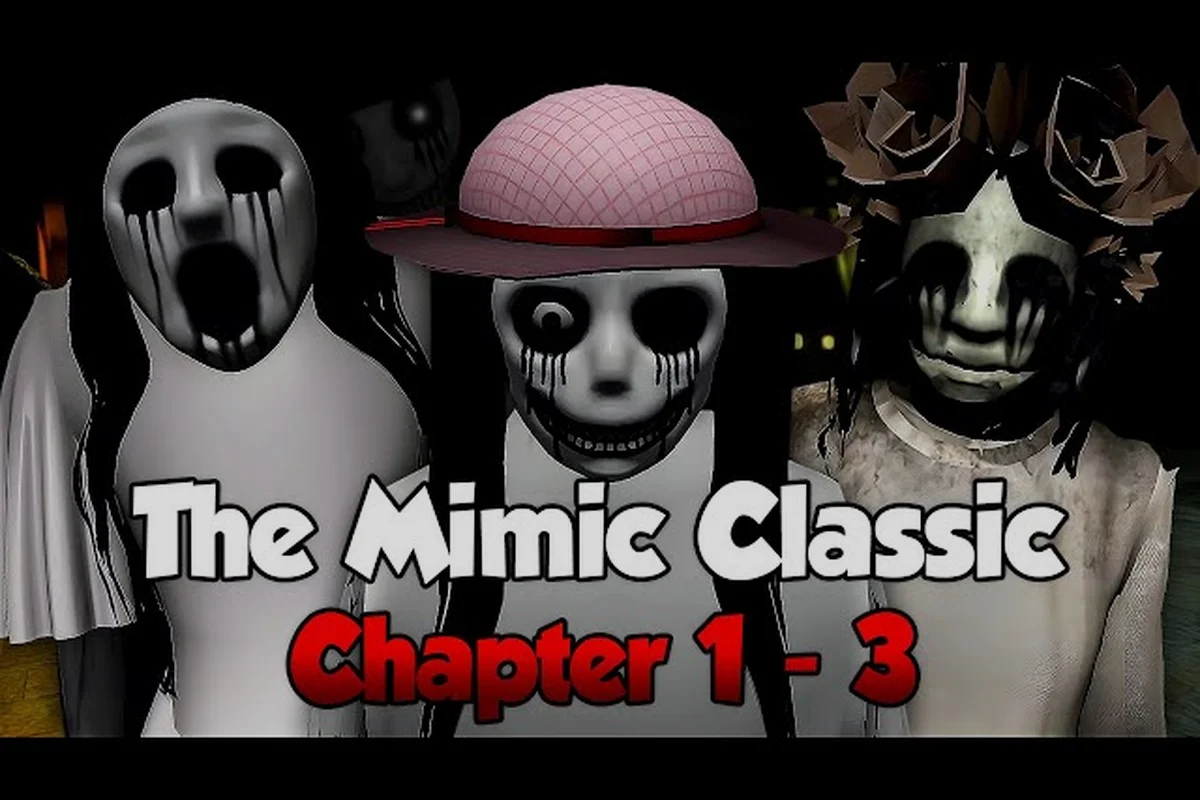
The Mimic locations list matters because every setting carries clues, danger, and a distinct place in the story. This guide maps the School, Japanese city, Sakura Swamp, caverns, and other key areas, including how each one connects to the books.
The Mimic Locations List at a Glance
The Mimic locations list spans abandoned schools, a rain-darkened Japanese city, tangled wetlands, underground caverns, imperial halls, a shipwreck area, and several unusual event spaces. Community data describes the School, Japanese city, Imperial Palace, Sakura Swamp, caverns, hotels, shipwreck areas, the Skull Maze of the 4 Beasts, and Omukade’s lair as the central roster, with hidden rooms and seasonal maps adding optional destinations.
Grouping the maps by purpose makes The Mimic locations list easier to use during a run: the School provides books, NPCs, and branching clues, while the Japanese city and Imperial Palace push the main investigation forward. By contrast, Sakura Swamp and the caverns test navigation through limited visibility and environmental threats, and the shipwreck area, Skull Maze of the 4 Beasts, and Omukade’s lair concentrate combat into focused encounters. Hotels function as social and lodging stops, whereas the Nightmare Circus and Christmas/Santa house depend on limited-time events, so their availability may differ from the permanent backbone maps.
| Location group | Main examples | What to expect |
|---|---|---|
| Story hubs | The School, Japanese city, Imperial Palace | Books, NPCs, branching clues, and progression |
| Wilderness areas | Sakura Swamp, caverns | Limited visibility, environmental threats, and hidden paths |
| Instanced spaces | Shipwreck area, Skull Maze of the 4 Beasts, Omukade’s lair | Focused challenges and enemy encounters |
| Optional or seasonal spaces | Nightmare Circus, Christmas/Santa house | Event-related maps that may not fit the main sequence |
| Social and lodging areas | Hotels | Rest points, exploration, and local activity |
This overview comes from the community-maintained The Mimic locations reference, which also identifies hidden rooms and seasonal areas. Because event maps can change, treat those entries as version-dependent while treating the principal story locations as the backbone of The Mimic all locations.
Book and chapter connections
Location order matters because each setting supports a different part of the broader narrative. The School introduces early horror conventions, the Japanese city expands the mystery, Sakura Swamp and the caverns isolate the player from familiar routes, and the Imperial Palace represents a later, more formal area of the story. Seasonal locations interrupt that progression rather than replacing it.
For the clearest reading order, use The Mimic books list alongside this location guide. That prevents a location discovered out of sequence from feeling like a major spoiler or leaving you unsure whether an unusual route is required.
A practical completion mindset
A complete run is not simply a straight line between major hubs. It can involve revisiting a location after receiving a clue, searching for hidden rooms, and finding book-related collectibles. The The Mimic items list is useful for checking whether a missing collectible points toward an overlooked corner of the current map.
The best approach is to separate three goals, then cross-check each one against The Mimic locations list: story progress identifies the next required clue, area exploration reveals side passages and hidden rooms, and collectible hunting verifies optional book pieces. For example, a room may appear visited after the main story advances, but an overlooked school corridor can still hold a The Mimic The School collectible or an interaction that changes what you can inspect later. Recording these categories on the map prevents a cleared encounter from being mistaken for a fully explored location.
-
Story completion: Follow the required clues and encounter triggers.
-
Area completion: Search side passages, locked-looking rooms, and building entrances.
-
Collection completion: Compare optional book pieces and event rewards with your inventory.
Treating those goals separately prevents a successful story advance from giving the false impression that every map has been exhausted. For example, clearing the story encounter in The Mimic The School does not confirm that its school map is fully searched, because side corridors and room entrances can still hide interactions or book collectibles. Check the relevant entry in The Mimic locations list after each major clue, then compare the location’s story state with the remaining areas, hidden-room routes, and optional The Mimic items list.
The Mimic Map Guide to the School
The Mimic The School is the clearest starting point for understanding the game’s location design. It functions as an early hub, but it also contains branching interiors, concealed spaces, and collectibles that reward careful exploration. The school map is easy to read only after you recognize that the building itself is the destination; entering the correct structure is not the same as finding every accessible area inside it.
School layout and priority routes
Begin by establishing the main route through the school grounds, then work through classrooms and corridors. This prevents repeated backtracking when a new clue points toward a familiar building. The central question is not merely where a room sits, but how its doors, stairwells, and side passages connect.
| School area | Exploration priority | Typical purpose |
|---|---|---|
| Main school building | High | Story clues, early progression, interior access |
| Classrooms | Medium-high | Collectibles, optional items, environmental details |
| Corridors and stairwells | High | Fast routes and branching connections |
| Restricted or hidden rooms | Medium | Optional rewards and late clue checks |
| School grounds | Medium | Orientation, approach routes, and book-related context |
The location’s strength comes from layered interiors: hallways connect rooms that look independent from outside, while restricted spaces make a return visit more useful. Player reports commonly emphasize checking doorways and secondary structures instead of relying on one obvious path through the grounds.
Why the school map matters for progression
Because the School is an early location, it establishes the reading habits needed later. If an item or clue appears under a desk, behind a cabinet, or near a rarely used entrance, the same search pattern can pay off in larger maps. Early map literacy is therefore more valuable than memorizing every corridor on the first visit.
A productive School sweep follows this order: first mark the route needed for the current chapter mission, then separate doors that lead onward from rooms that only contain optional clues. This distinction prevents a promising corridor from being missed while also avoiding wasted backtracking. For example, if a mission requires a specific classroom or stairwell, trace that route from the main approach before checking desks, cabinets, or hidden entrances. The School becomes easier to map once its required exits, optional rooms, and vertical connections are treated as separate checks rather than one undifferentiated search area.
-
Main approach: Identify the entrance used for the required progression route.
-
Interior branches: Check each classroom and corridor connecting two spaces.
-
Optional rooms: Inspect locked-looking or partially hidden entrances.
-
Vertical routes: Check stairs, upper floors, and accessible landings.
-
Return pass: Revisit previously cleared rooms after collecting new clues.
The School is also where players can learn the value of combining a map with a collection checklist. A blank corridor may simply be optional, but a blank corridor associated with a known item or book clue can point toward a missing route. If you are unsure which story mission should follow, the chapter walkthrough can clarify the intended sequence.
Common mistakes at the School
The most common error is treating every unlocked door as required. Some doors merely shorten movement or support an optional encounter. Another error is overlooking the space above or beside the obvious search area, particularly when the game’s key objects appear at unusual heights.
At the School, inspect every room against the objective before opening a door, since optional shortcuts can otherwise consume time without contributing to the location checklist. For example, check the classroom and corridor areas for key objects placed above eye level or beside partitions rather than only behind furniture; this matters because a missed School clue can leave the required door locked.
-
Look for environmental tells: Shelves, partitions, and narrow gaps often indicate an interactable path.
-
Trace loops: Corridors that return to a junction may conceal a side entrance.
-
Save after a major branch: This protects progress when the next clue requires a long return.
-
Do not ignore exterior structures: The school setting includes more than the most prominent building.
The Mimic Maps Explained by Setting and Story Role
The Mimic maps explained here are not all identical in scale or purpose. The School uses interconnected interiors, the Japanese city emphasizes streets and named buildings, Sakura Swamp relies on natural landmarks, and the Imperial Palace presents formal spaces with stronger visual boundaries. Recognising the map language of each region helps you search more intelligently.
Japanese city and urban buildings
The Japanese city is the major urban hub in the location roster. Its streets connect different activities, while individual buildings and alleys can hide side objectives. Compared with the School, navigation depends more on street landmarks and entrances, so orienting yourself after every major transition is useful.
| Urban feature | Navigation cue | Likely reward |
|---|---|---|
| Main streets | Repeated signs and intersections | Faster travel and clearer orientation |
| Side alleys | Narrow entrances or changing sight lines | Optional items and secrets |
| Named buildings | Distinct interiors and map markers | Story access and local clues |
| Hidden rooms | False walls, unusual props, or blocked corners | Rare collectibles and completions |
| Hotels | Enterable lodging spaces | Exploration, rest, and side activity |
The city rewards a landmark method: choose one obvious visual feature, use it to confirm where you are, and then identify the next street or doorway. Because some locations have similar corridors or facades, relying only on a vague sense of direction can send you around the same block repeatedly.
Sakura Swamp
Sakura Swamp changes the rules of navigation. Trees, pools, and vegetation limit sight lines, while landmarks may be less consistent than buildings. The map is not about memorising every straight line; it is about tracing the routes between recognizable terrain features and checking alternate banks.
Sakura Swamp’s branching paths reward players who backtrack deliberately. When a route dead-ends, check the opposite bank, nearby tree line, or slightly elevated ground before declaring the area exhausted. Wet conditions and the eerie setting can make identical landmarks feel more different than they are, so a written landmark description is helpful.
Caverns
The caverns are the clearest underground counterpart to the School’s interior exploration. Their layout relies on turns, vertical space, and environmental boundaries rather than street grids. Players should watch for side openings before major junctions, because a narrow passage near the main route may lead to a larger chamber or optional reward.
Lighting and visibility can change how a cave feels without changing its geometry. Treat a dark route as unresolved until you can confirm whether it ends at a wall, turns upward, or connects to another passage. Avoid turning around immediately after one difficult encounter, since the return route may reveal an entrance that was invisible during the first pass.
Imperial Palace
The Imperial Palace belongs to a later, more formal visual environment. Its long rooms, ceremonial areas, and controlled pathways create a different rhythm from the School or Swamp. The core challenge is often less about finding the road and more about identifying which chambers participate in the current objective.
Use the Imperial Palace’s symmetry as an orientation tool. Compare repeated halls, balconies, and decorated entrances, and notice which features differ from the standard pattern. A room that appears unusually plain or unusually ornate may be more relevant than the largest hall. Keep the palace route centered on book clues so optional detours do not obscure the required path.
Every Major and Optional Location
The Mimic all locations roster includes more than the four areas most often shown in previews. Community records also list hotels, the shipwreck area, the Skull Maze of the 4 Beasts, Omukade’s lair, hidden rooms, the Nightmare Circus, and a Christmas/Santa house. Some are central progression spaces, while others are optional or tied to events, so their importance should not be judged by map size alone.
Complete location roster
| Location | Status | Practical description |
|---|---|---|
| The School | Major story area | Early hub with dense interiors, clues, and optional rooms |
| Japanese city | Major story hub | Urban exploration across streets, buildings, alleys, and hotels |
| Sakura Swamp | Major wilderness area | Natural routes with limited sight lines and side paths |
| Caverns | Major underground area | Turning passages, vertical spaces, and hidden chambers |
| Imperial Palace | Major story area | Formal complex associated with later progression |
| Hotels | Supporting locations | Lodging spaces within the broader urban experience |
| Shipwreck area | Instanced location | Focused area associated with exploration and danger |
| Skull Maze of the 4 Beasts | Instanced location | Named challenge space tied to beasts and encounters |
| Omukade’s lair | Instanced location | Direct confrontation setting associated with Omukade |
| Nightmare Circus | Seasonal or event location | Special-event map with a distinct theme |
| Christmas/Santa house | Seasonal or event location | Holiday-specific area that may be time-limited |
| Hidden rooms | Optional sub-locations | Side spaces discovered through careful search |
This table should be read as a navigation index rather than a guaranteed story order. Event-only maps may not appear during a standard campaign, and community pages may document spaces through photos, player reports, or update-specific discoveries. Last verified on October 31, 2026, the roster should still be checked against the version currently in your hands.
Instanced areas and their special rules
Instanced locations are easier to classify once you separate their objective from their layout. The shipwreck area emphasizes isolated exploration, the Skull Maze of the 4 Beasts presents a concentrated beast-themed challenge, and Omukade’s lair is framed around a major confrontation. The exact enemy sequence may vary by version, but the practical distinction remains clear: these are focused spaces rather than everyday hubs.
Before entering, check inventory space and current objectives. Collect nearby clues before pursuing the central threat, because an encounter can end the attempt and send you back to the entrance. The The Mimic monsters list can help identify enemies that appear across these maps and clarify which threats deserve priority.
Seasonal and event-only maps
The Nightmare Circus and Christmas/Santa house belong on The Mimic all-locations list because they contain optional objectives that can count toward a run, even though their event availability may be limited. Treat them as seasonal or event-only maps rather than permanent chapter markers: entering The Nightmare Circus or the Christmas/Santa house may provide extra progression opportunities during its active event, but neither should be used as a required waypoint when organizing The Mimic locations by campaign sequence.
If one is unavailable, check event timing and platform availability before trying to diagnose a missing map. Do not use a seasonal location as a required chapter marker. Likewise, treat screenshots or videos of a festive area as evidence of limited content rather than proof that it permanently expands the main route.
How to Explore Each The Mimic Location Efficiently
The Mimic locations explained through a consistent method will produce fewer frustrating searches than memorizing every door. Start with the objective, identify the map’s dominant landmark system, clear the required route, and only then expand into optional rooms. This four-stage process works whether you are revisiting the School or entering a secluded area such as Omukade’s lair.
Four-stage sweep: objective check before optional search
| Stage | Action | Reason |
|---|---|---|
| 1. Objective check | Read the current clue and identify the required destination | Prevents wandering away from progression |
| 2. Landmark pass | Note one major visual feature and one route type | Creates a mental map under pressure |
| 3. Required clear | Follow the critical route and defeat blocking enemies | Advances the chapter efficiently |
| 4. Optional sweep | Check side rooms, hidden spaces, and collectible spots | Improves completion without confusing story order |
The required-clear stage should come first because it separates a possible soft lock from optional curiosity. If you can advance with the current information, complete that advancement and then return to a broad search. This ordering prevents a valuable clue from being delayed by another branch that may not contain anything needed.
Branch management and backtracking
Locations such as the Japanese city and the caverns often create loops. When a route branches, leave yourself a simple mental marker: “returned from the blue doorway,” “crossed the swamp from the statue,” or “reached the hotel entrance.” These descriptions are more reliable than saying an area is near the middle because many spaces repeat similar shapes.
Keep a short route log with three entries: the last confirmed landmark, the next required clue, and any unresolved branches. For example, after finding the blue doorway, note whether you reached the hotel entrance or crossed Sakura Swamp from the statue, then record which clue points toward the next area. Marking locations by these distinctive landmarks makes repeated corridors and dead ends easier to trace when backtracking through The Mimic.
-
Last confirmed landmark: where you know you were.
-
Next required clue: what should point to the next area.
-
Unresolved branches: spaces worth checking after advancing the story.
This method is particularly useful in Sakura Swamp, where a dead end may conceal an alternate bank. In interiors, pair the log with a doorway check, since the relevant boundary is often a wall segment rather than an open path.
Finding books, items, and hidden rooms
A location is only partly explored if its collectibles remain unchecked. Books and items often direct attention toward specific architecture: a locked room, a concealed staircase, or an object placed near a hidden entrance. Use the chapter walkthrough to match a clue with its destination, then compare your results against a collectible checklist.
Do not open every container indiscriminately; in The Mimic, loot is often paired with architectural clues, so prioritize searchable objects before widening the sweep. Check shelves, desks, lockers, and loose papers for notes that name a room, then follow the clue through the School corridors rather than treating every pickup as a dead end. If a collectible points toward a locked door or concealed staircase, record its location and revisit it after finding the required key or trigger. This targeted route makes the The Mimic school map easier to annotate and helps distinguish hidden-room access from ordinary collectible placement.
-
Objects placed out of ordinary alignment.
-
Walls or doors that do not match the surrounding pattern.
-
Unusual interactable props near otherwise empty corners.
-
Repeated references to the same building or landmark.
-
Collectible hints that describe a room rather than an enemy.
When to revisit an area
A map should be revisited after a new clue changes your interpretation of the space. The School is a common example because an early room may gain relevance later. The same principle applies to urban buildings, hidden passages, and event spaces if their availability changes. Revisiting with a fresh objective is often more productive than repeating a familiar search route.
Book Connections, Chapter Order, and Final Checks
Locations in The Mimic carry story meaning through the books and objectives attached to them. Knowing which book is active helps explain why a city street matters, why a hidden room opens, or why a particular destination is repeatedly mentioned. The connection becomes easier to track when you compare location progress with the broader book sequence rather than treating every clue as a standalone errand.
Reading the story through its settings
The School provides the earliest sense of mystery and experimentation. The Japanese city broadens the scale, placing personal clues inside a larger urban network. Sakura Swamp and the caverns change the atmosphere by narrowing routes and removing stable landmarks. The Imperial Palace then provides a formal setting suited to later revelations.
| Story phase | Strongly associated setting | Exploration lesson |
|---|---|---|
| Early progression | The School | Learn to check branches and interior spaces |
| Wider mystery | Japanese city | Use landmarks and named destinations |
| Isolation and danger | Sakura Swamp and caverns | Track alternate paths carefully |
| Formal confrontation | Imperial Palace | Compare repeated spaces and find exceptions |
| Special or side content | Instanced and seasonal maps | Separate optional content from required chapters |
This structure explains why environmental contrast matters. Bright, formal palace spaces should feel different from the cramped School and the obscured Swamp, but the underlying task remains constant: match a clue to a destination, explore it, and determine whether the search reveals a new route.
Complete-versus-critical checklist
Use two checklists when judging completion. The critical list should contain every required book, clue, and progression encounter. The completion list adds optional collectibles, event rewards, hidden rooms, and alternate approaches. A location can be critical-complete but not fully explored, and a game run can contain every major map while still missing seasonal content.
| Check | Critical completion | Full exploration |
|---|---|---|
| Books | All required books collected | Any book-linked collectibles completed |
| Clues | Every required clue activated | Optional clues and environmental references checked |
| Locations | All story-critical areas visited | Hidden rooms and event-only spaces visited |
| Encounters | Required fights cleared | Optional encounters and variants attempted |
| Secrets | No progression blockers | Major item and resource checks complete |
A clean run requires both the critical-completion and full-exploration columns, not merely every map icon visited. If any required book, clue, or progression encounter remains on the critical checklist, revisit that chapter and resolve the specific gate before judging the locations list complete. When the story-critical route is finished, work through book-linked clues and inspect each hidden-room trigger in sequence, since activating the correct clue may reveal a separate event-only space rather than granting immediate access.
Final location-by-location review
Before calling the map finished, revisit the School’s restricted rooms, the Japanese city’s side alleys and hotels, alternate edges of Sakura Swamp, side chambers in the caverns, less obvious Imperial Palace rooms, and any currently available event map. Confirm that optional objectives have not been mistaken for required steps.
The complete community-maintained version of The Mimic locations list is best treated as a living reference. The major story settings form a dependable framework, while hidden and seasonal entries may change with updates. This guide closes by consolidating the map’s purpose: every location offers clues, every branch can contain meaningful content, and a clear checklist is the safest way to distinguish what remains from what is genuinely optional.
Frequently Asked Questions
How many locations are in The Mimic?
The exact playable total depends on how event maps and hidden rooms are counted. The principal roster includes the School, Japanese city, Imperial Palace, Sakura Swamp, caverns, hotels, the shipwreck area, the Skull Maze of the 4 Beasts, and Omukade’s lair, while community data also records seasonal and hidden spaces.
What is the best way to explore the school map?
Start with the main route, check every classroom and corridor, then inspect restricted-looking entrances and side structures. Return after new clues because an early room may become relevant later. Comparing the area with your book and collectible checklist prevents small optional rooms from being forgotten.
Are seasonal locations required to finish the game?
Seasonal locations such as the Nightmare Circus and Christmas/Santa house are generally associated with limited-time content rather than the permanent chapter sequence. Availability can vary by platform and event period. Finish the required books and story locations first, then treat event maps as optional completion goals.
Does The Mimic have a complete map for every region?
No single overview image is guaranteed to reveal every side passage, hidden room, or inaccessible event area. The School and Japanese city need interior checks, while Sakura Swamp and the caverns require careful branch tracking. Combine the location roster with chapter clues, inventory checks, and community reports for the most complete result.
Should all locations be completed before moving to the next book?
No. Required locations for the current book should be completed first so the story can advance without unnecessary backtracking. Optional rooms, collectibles, and event spaces can be cleared afterward. This approach keeps progression efficient while still supporting a thorough final completion pass.